
My loom has a sectional warping beam, which means that I wind on one inch at a time. If the fabric has 24 threads per inch, then I need 24 wound bobbins on the bobbin rack, and each bobbin must have enough for the full warp length for that section, or I'll have to knot on a fresh bobbin. Cotton towels and blankets in twills often use this sett; my wool blankets are usually 12 ends per inch. I use entire cones or wound bobbins for the towels and cotton blankets. The wool I use is usually on cones or skeins and must be wound onto big bobbins.
The beaming process goes fairly quickly once all the bobbins are ready. I wind the planned length of the total warp onto each inch of the loom. That means 60 inches of wound sections for full-width blankets. Below is an almost-beamed 30"-wide warp for towels:

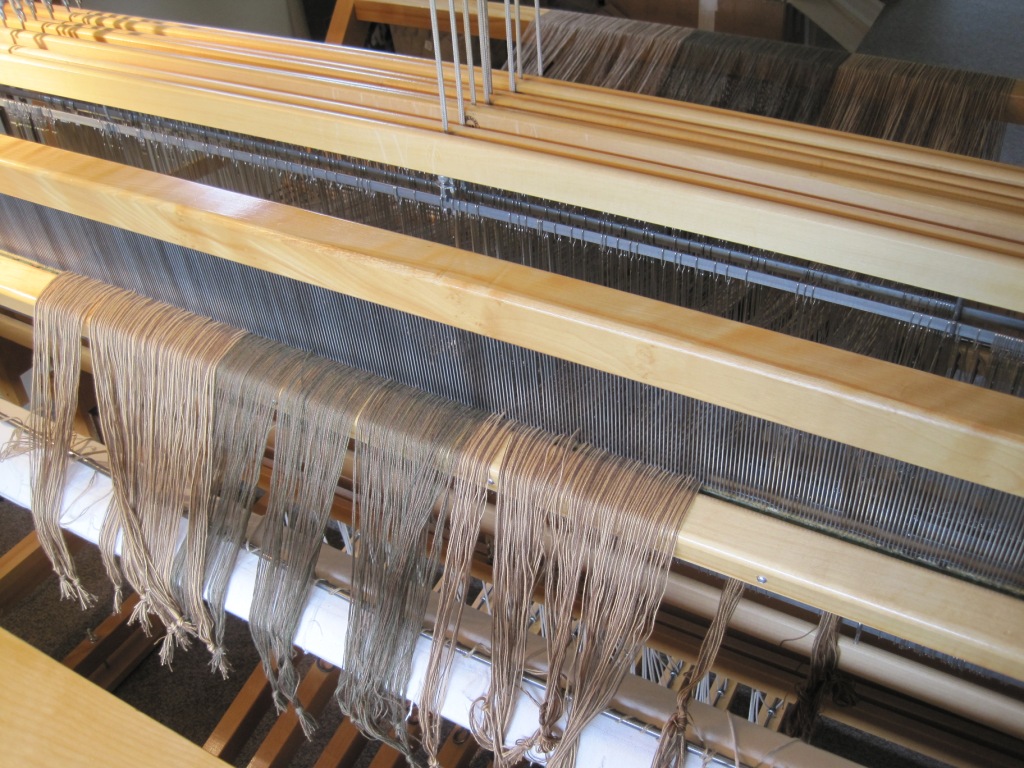
When all the yarns are wound onto the loom's back beam, I then thread each one through a wire heddle. Precision for this step is critical. Most of my projects are designed to have a consistent end point for each section so that I can maintain correctness. If not, I design a threading map that helps me stay on track for more complicated patterns. There is nothing more exasperating than finally starting to weave and finding a big threading error, something I try to avoid at all costs.
The threading process can be quite tedious, as I'm standing and bending between the back beam and harnesses and threading up to 1440 individual yarns through one of eight harnesses. But, with practice I can do this as efficiently as possible. Enjoy the flow ...

Then I move to the front of the loom and bring each thread through a space in the reed. Usually the threads are grouped and I check the threading as I sley the reed. For each inch, I knot those threads under the same tension to keep them from sliding out, as well as to save a step in the next process.
Finally, the warp is ready to be tied on to the front beam. I thread a strong piece of doubled linen or cotton from the rod on the front beam through the middle of each knotted section. Then, I even up the tension on all sections, tie on securely at the final end and ... take a break or forge on.
Important point: Those steps are never all done in one day!
The very beginning of the warp is always a bit wonky to weave until it starts to work as a unit. I expect this but I'm still very observant for errors in threading, sleying or individual thread tension. Beginning with plain weave in a contrasting colour points out errors very quickly.
Now I'm ready to start weaving my planned project. All the design and warping steps are completed, and my investment in time and energy is ready to reap the real rewards - the enjoyment of making cloth.
No comments:
Post a Comment